4. How to receive notifications for Facebook Comments
5. Google Analytics Setup
1. Twitter Feed Setup
We have a great tutorial to help get the Twitter feed up and running within our documentation. The tutorial includes step-by-step instructions + images to help you get it up and running within a few minutes.
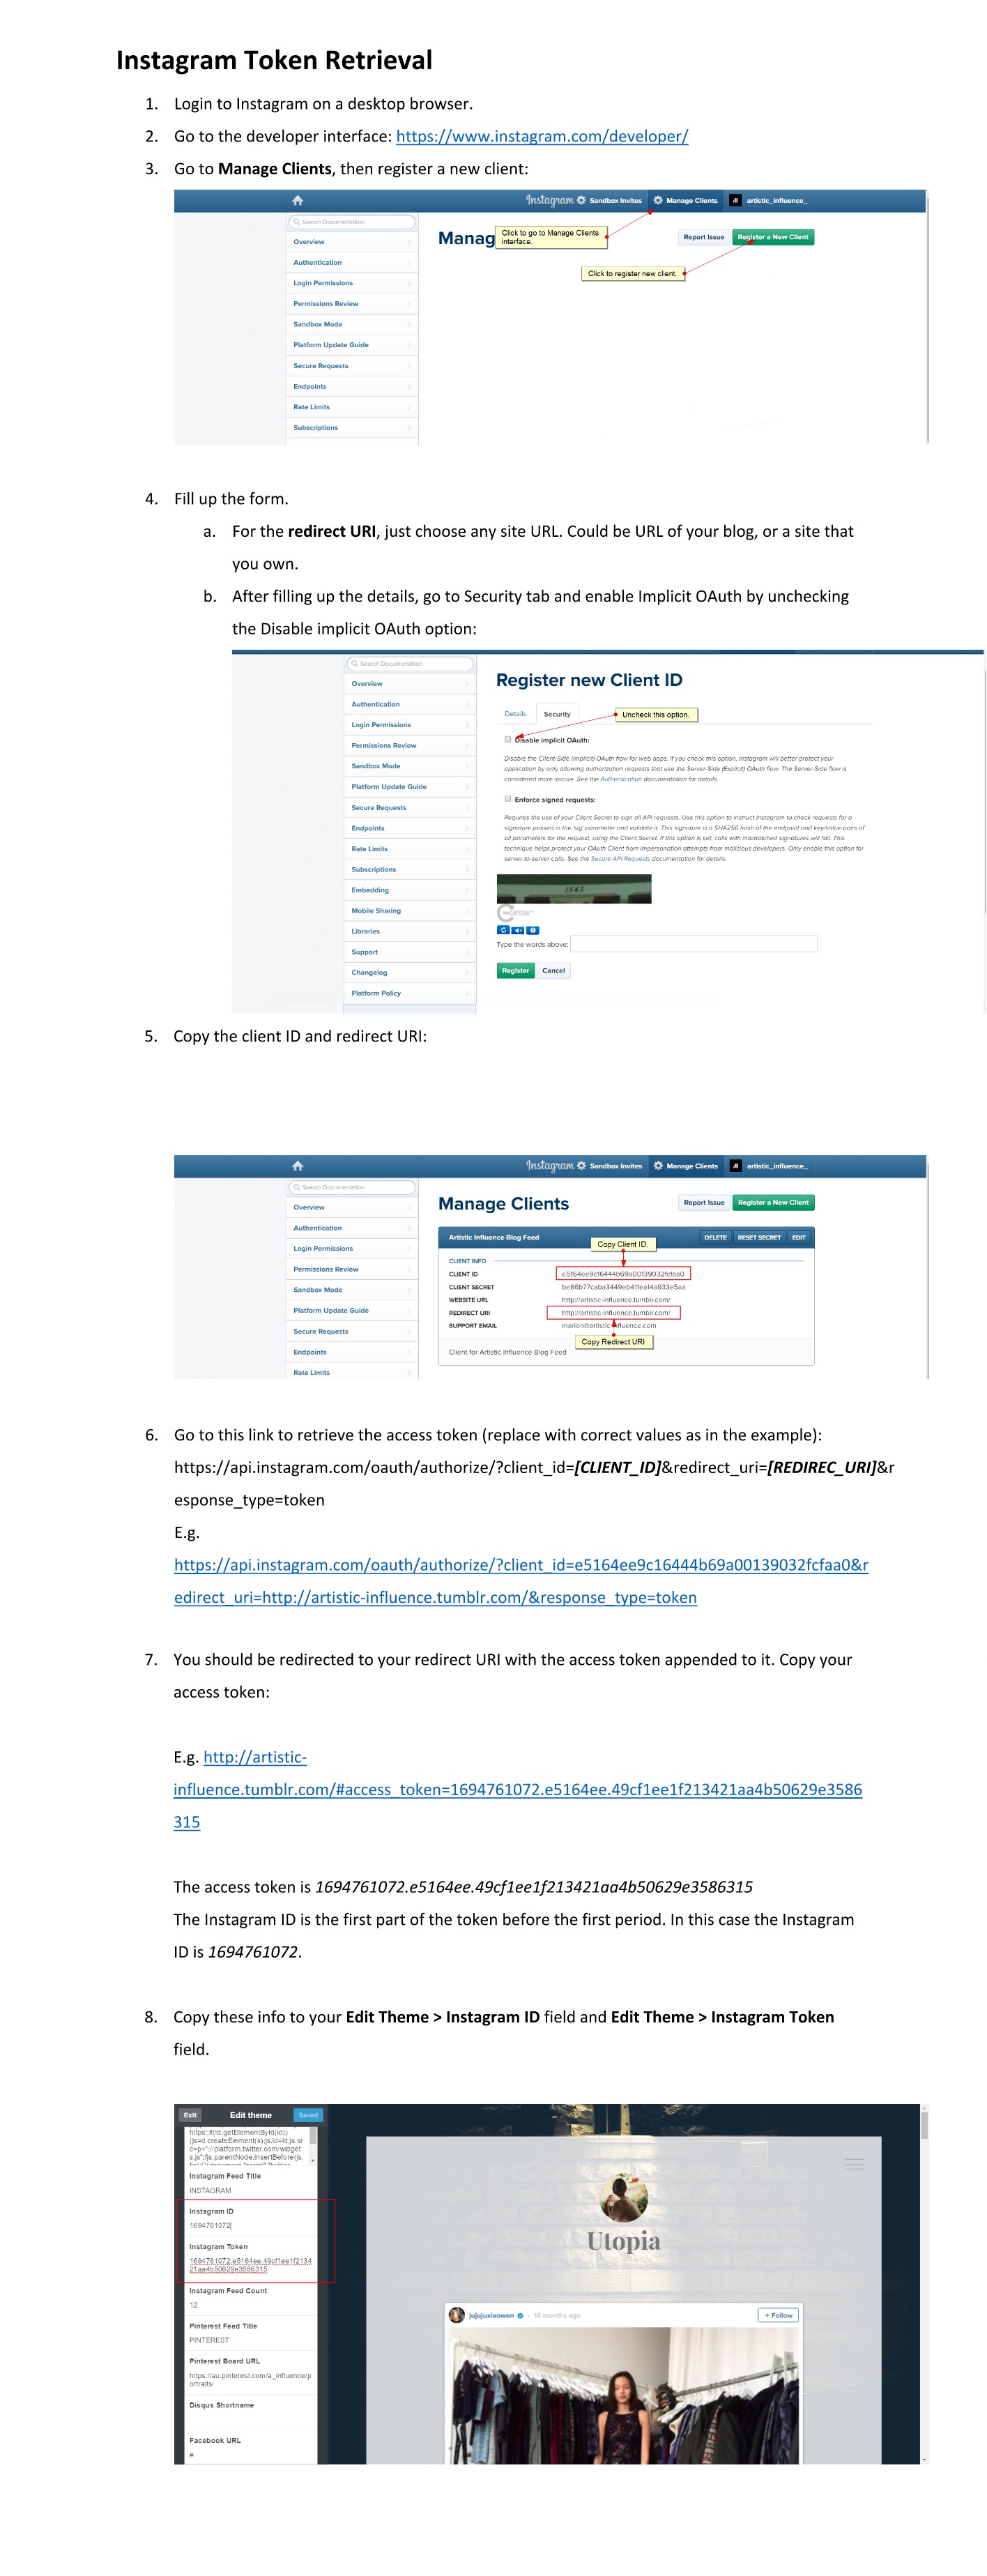
If you’d like a Instragram feed on your home page as seen in the Candice demo, you will need two pieces of basic info which is your Instragram ID and Access token. This can be done quite easily by following the instructions below.
Instagram ID and Access Token - Luckily this information is quite easy to retrieve even for non-developers.
3. Google Font Setup
Although Tumblr offers some awesome fonts for all users to incorporate into themes for free, you may or may not find exactly what you are looking for which is why we've integrated Google Fonts into every theme we make. Google Fonts has over 500+ free fonts available to anyone. Depending on your experience with using Google Fonts, you may run into some difficulties in figuring out how to use your chosen font which is why we've created this infographic below to help you set up your font through textual and visual instructions.
4. How to receive notifications for Facebook Comments
Hey! :)
Since we've implemented Facebook Commenting system into our themes, we've had support questions regarding notifications not appearing after a visitor has commented on your blog post. This article has been created to directly help any users having the same issue.
There is a solution to this and our senior developer Marion has illustrated this solution in easy to follow step-by-step instructions.
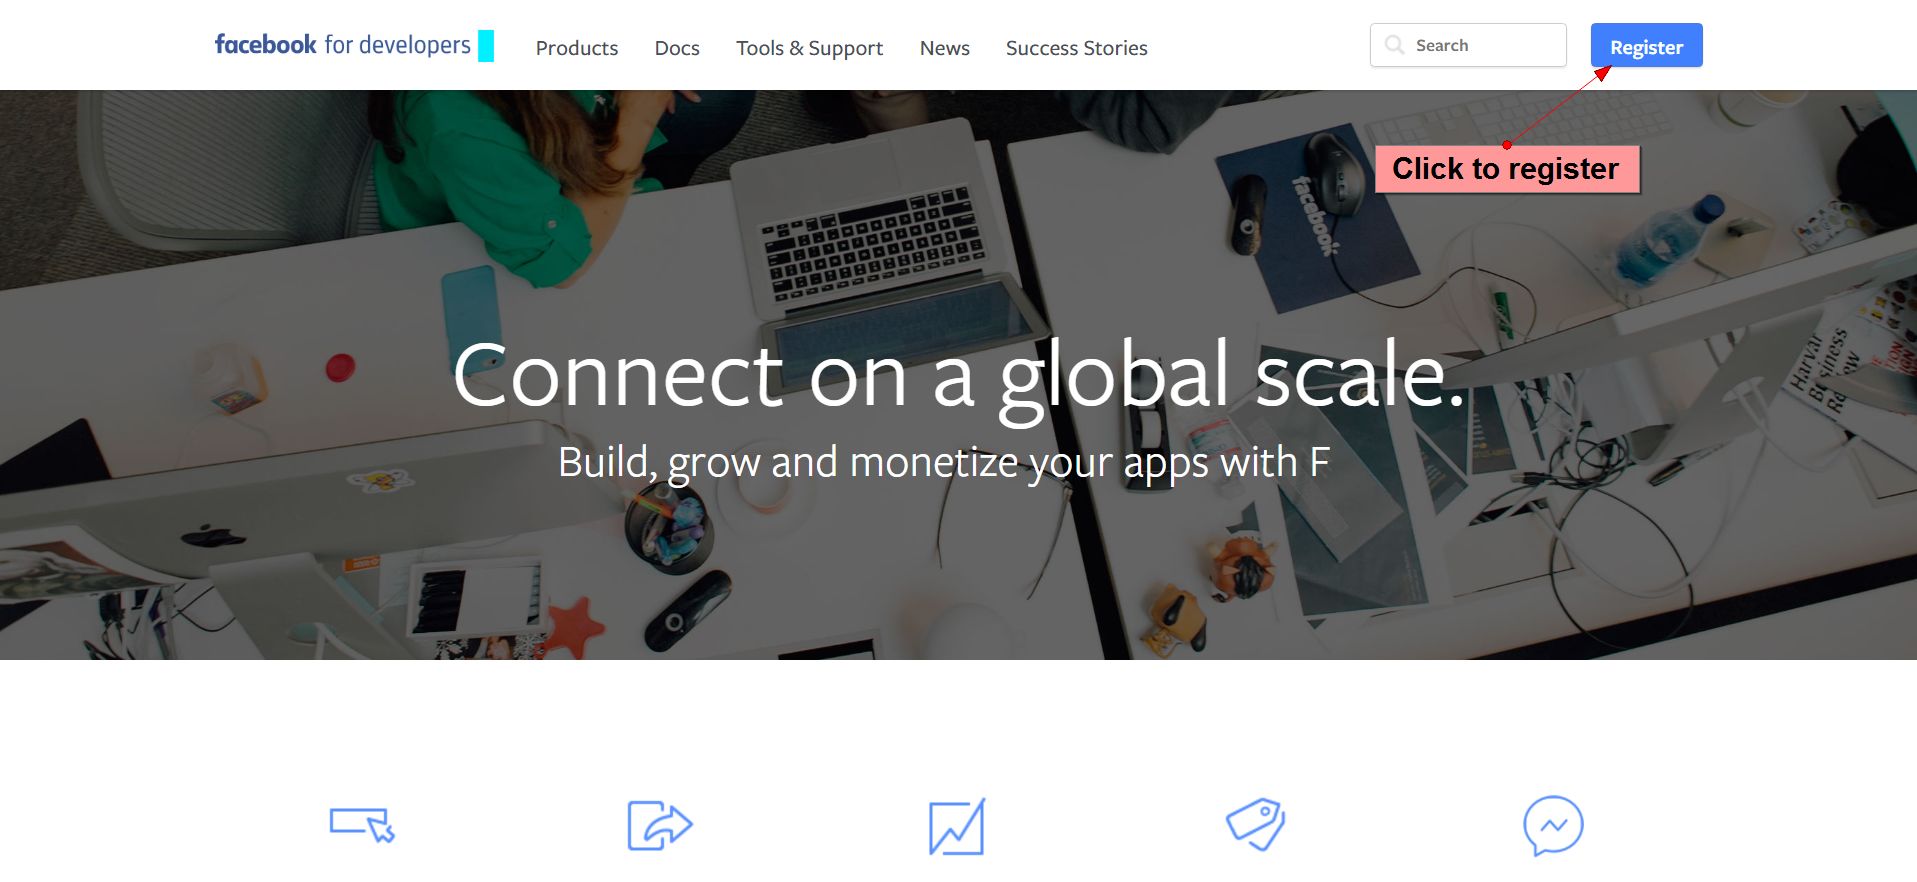
FB App Setup: 1. First step is to have yourself registered to a developer account for Facebook @ https://developers.facebook.com if you don’t have an account yet.
2. Second step is to create a Facebook App.
3. Next step is to make your Facebook App public. To do this, go to the App Review panel, and toggle the option under “Make [app name] public?”.
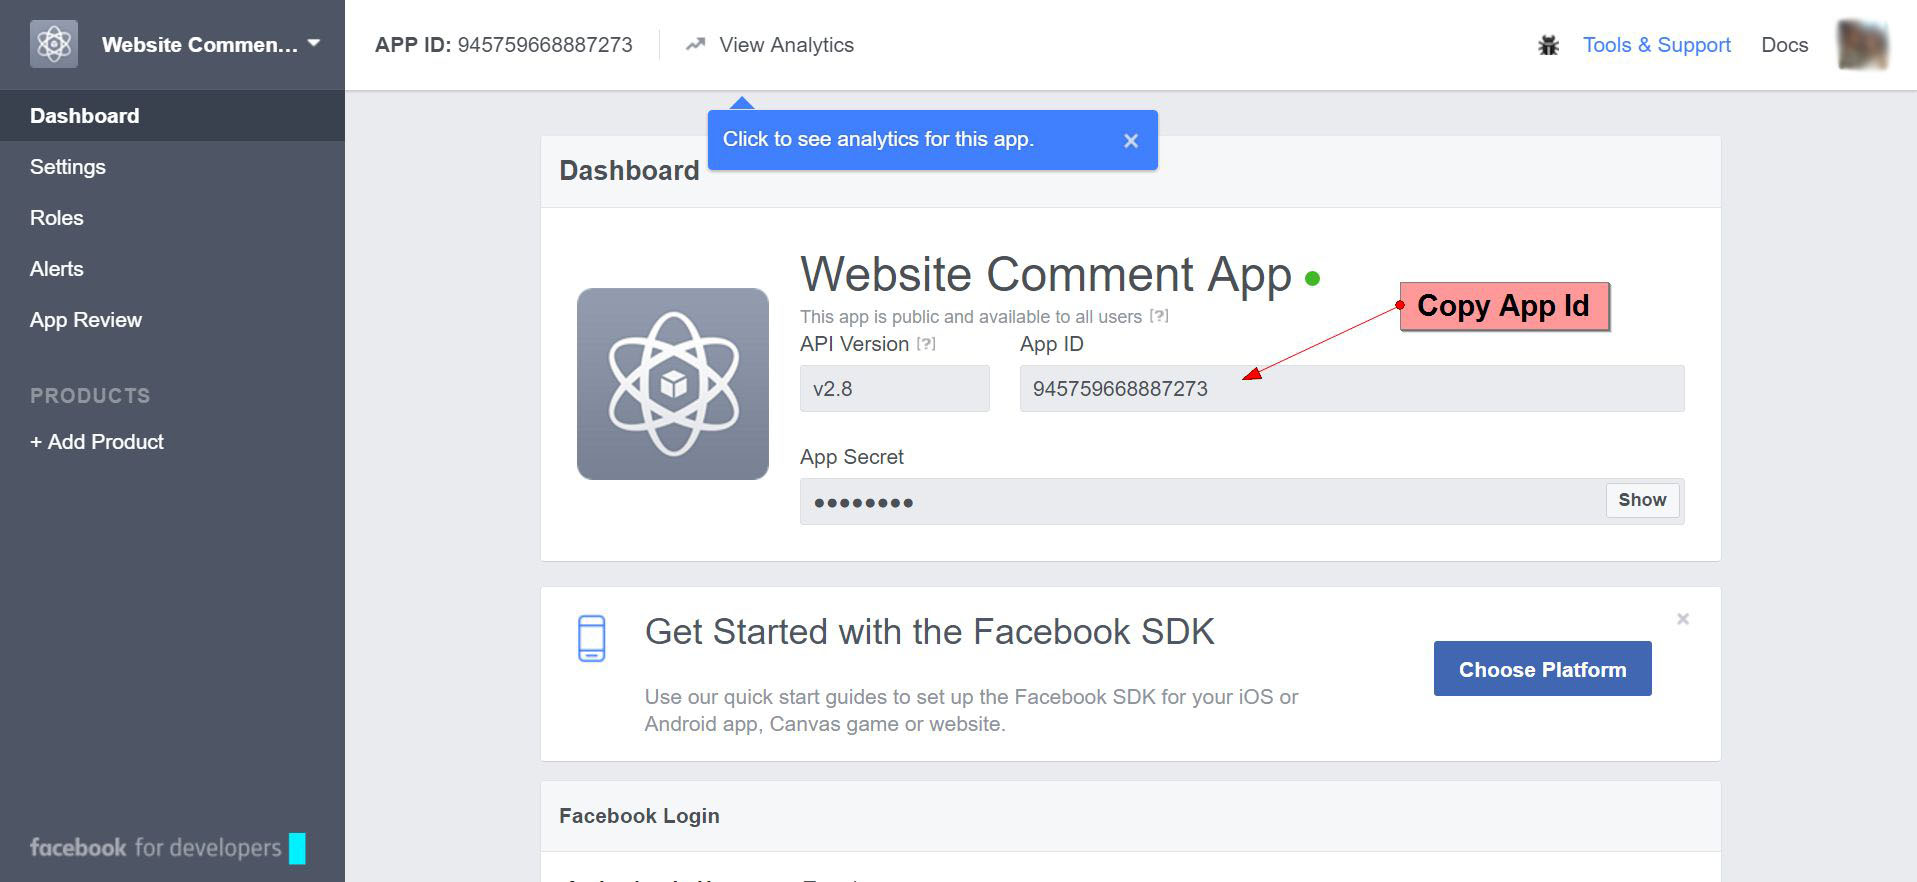
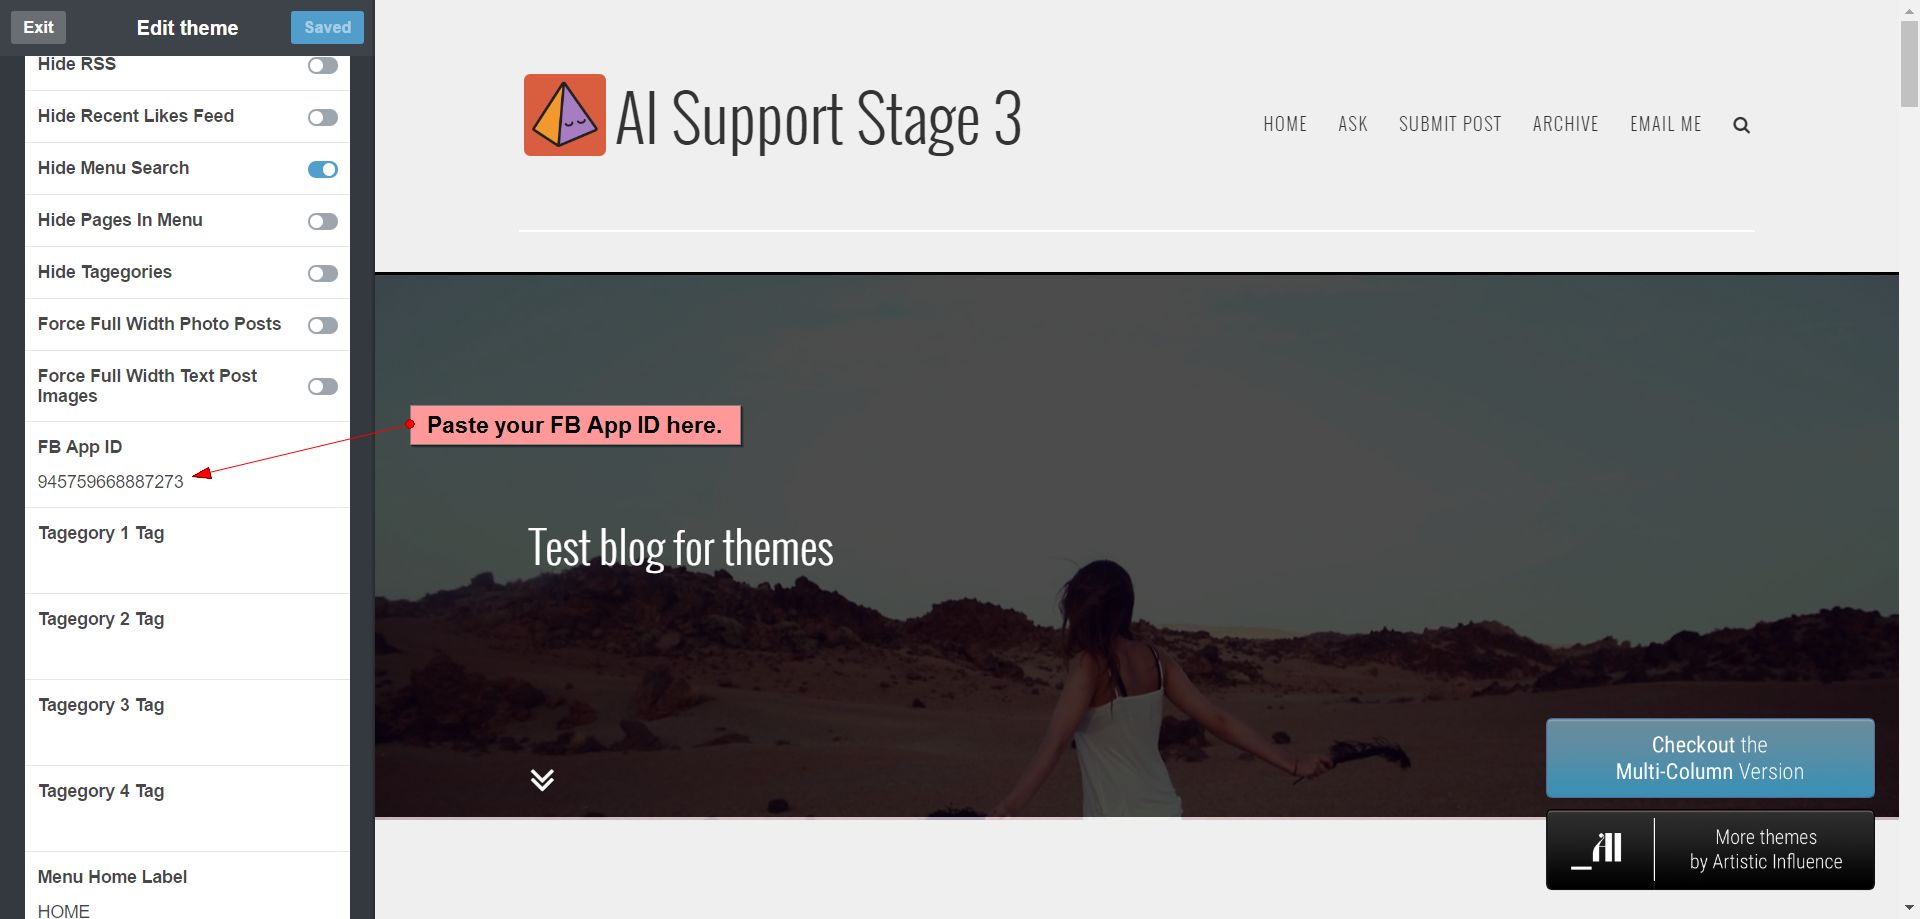
4. Then from there, you can now get your App ID and take note of this since this will be used in later steps.
5. Last step in setting up the Facebook app is to set your moderators. To do this, you will need to go to this link: https://developers.facebook.com/tools/comments/[app_id]. Just replace [app_id] with your FB App ID you copied in step 4 (i.e. https://developers.facebook.com/tools/comments/945759668887273).
Then go to settings via the settings link. Inside the settings window, make sure that the Enable Notifications options is turned on. You can also set the default options and rules for your comment app from here. But the important step is to set your moderators via the Moderators tab. Here you can set any Facebook account as moderators of your comment app, but most importantly, you have to set you own Facebook account as a moderator in order for you to receive notifications every time someone makes a comment.
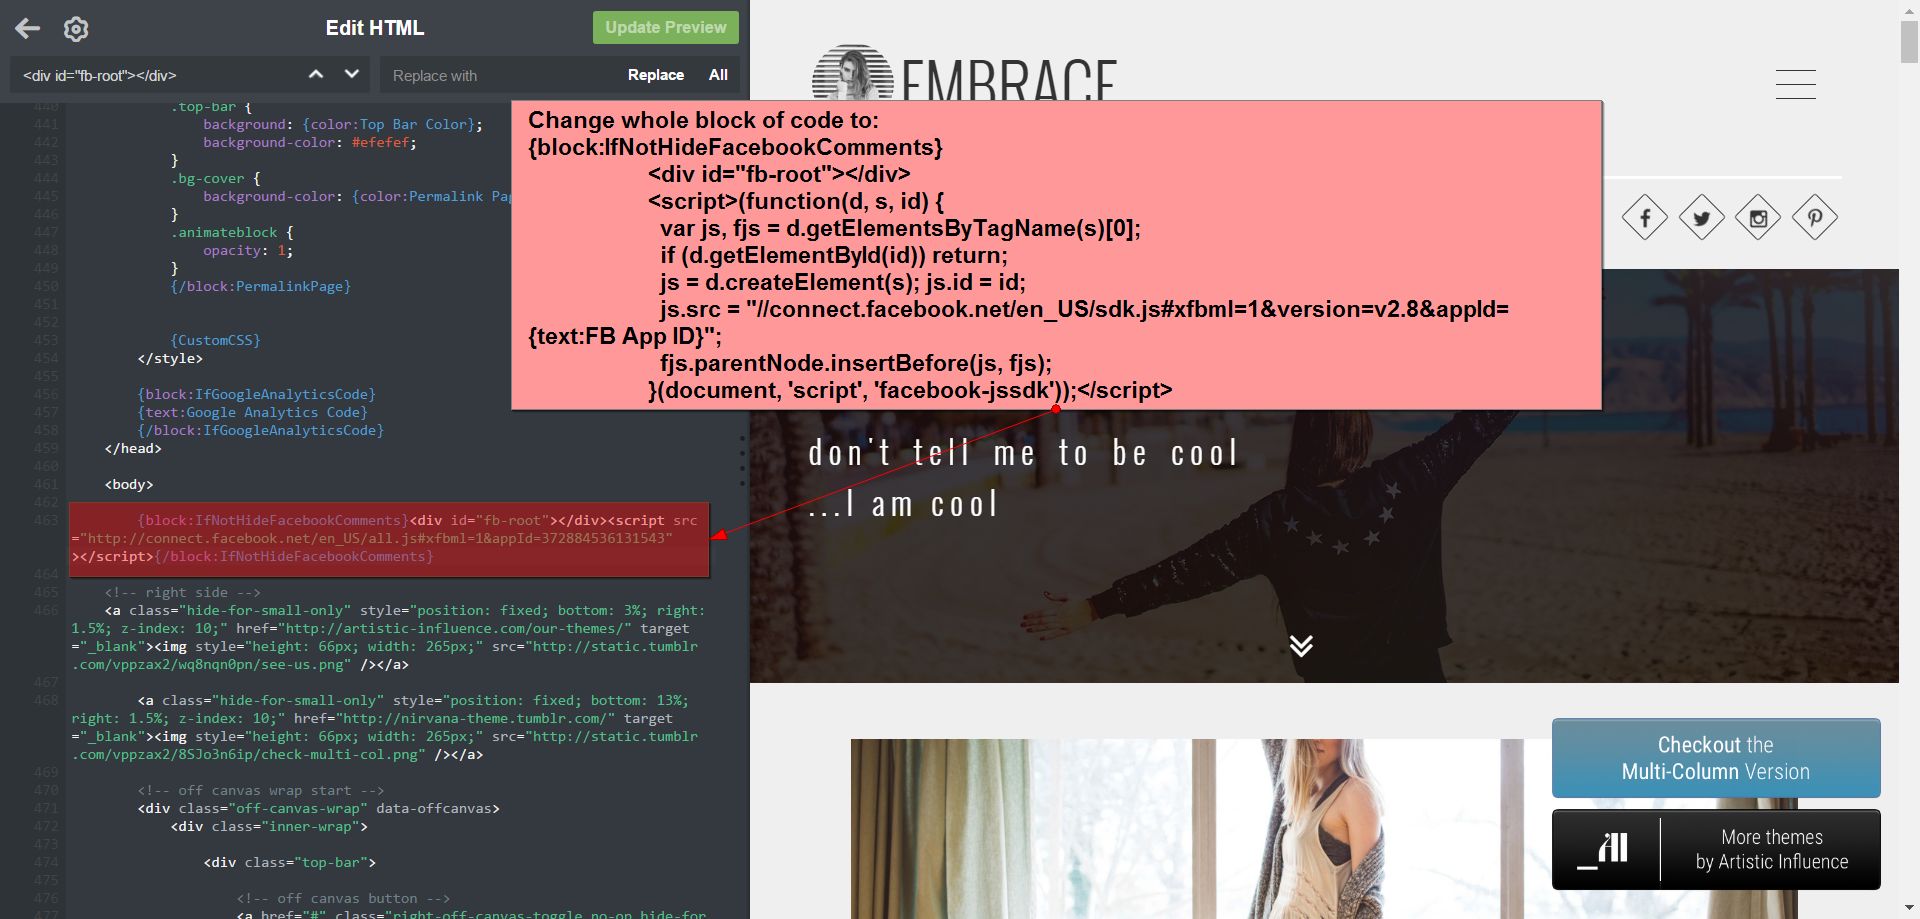
Theme modification:
For the theme modification, there is a very minor change you will need to make which will be outlined below:
1.First step is to add an option for the Facebook app ID. So, somewhere along the header where the text options are found, you will need to add the option:
P.S. Don’t forget to input your Facebook App ID into your option in the backend. And lastly, do note that the individual moderators can receive notifications from comments by other users, but not comments the moderator made himself. And to view all the comments made in your blog via the FB comment plugin, you can view them here: https://developers.facebook.com/tools/comments/[fb_app_id]/. (i.e. https://developers.facebook.com/tools/comments/945759668887273/)
Hope this helps, and of course if you are still having troubles please do not hesitate to open a support ticket where we'll be able to help troubleshoot your issue :)
5. Google Analytics Setup
If you’d like to monitor your sites analytical data and have registered for Google Analytics, you can easily add your tracking code into your blog. If you do not yet have a Google Analytics account, visit http://www.google.com/analytics/, register an account for your blog website.
Now, assuming you've ticked off the prerequisites required for setting Google Analytics up on your blog, simply visit this link below for step-by-step instructions made out in infographic style to help guide you through the setup process in as simple of a way as possible: